Easy Digital Downloads plugin
Features
Fully integrated with the Easy Digital Downloads backend
Instant and delayed capture
Full and partial refunds
Void transactions
Steps:
-
Sign up with Paylike
If you haven't done so already, head over and sign up with Paylike and create a live account.
-
Install the Paylike payment plugin
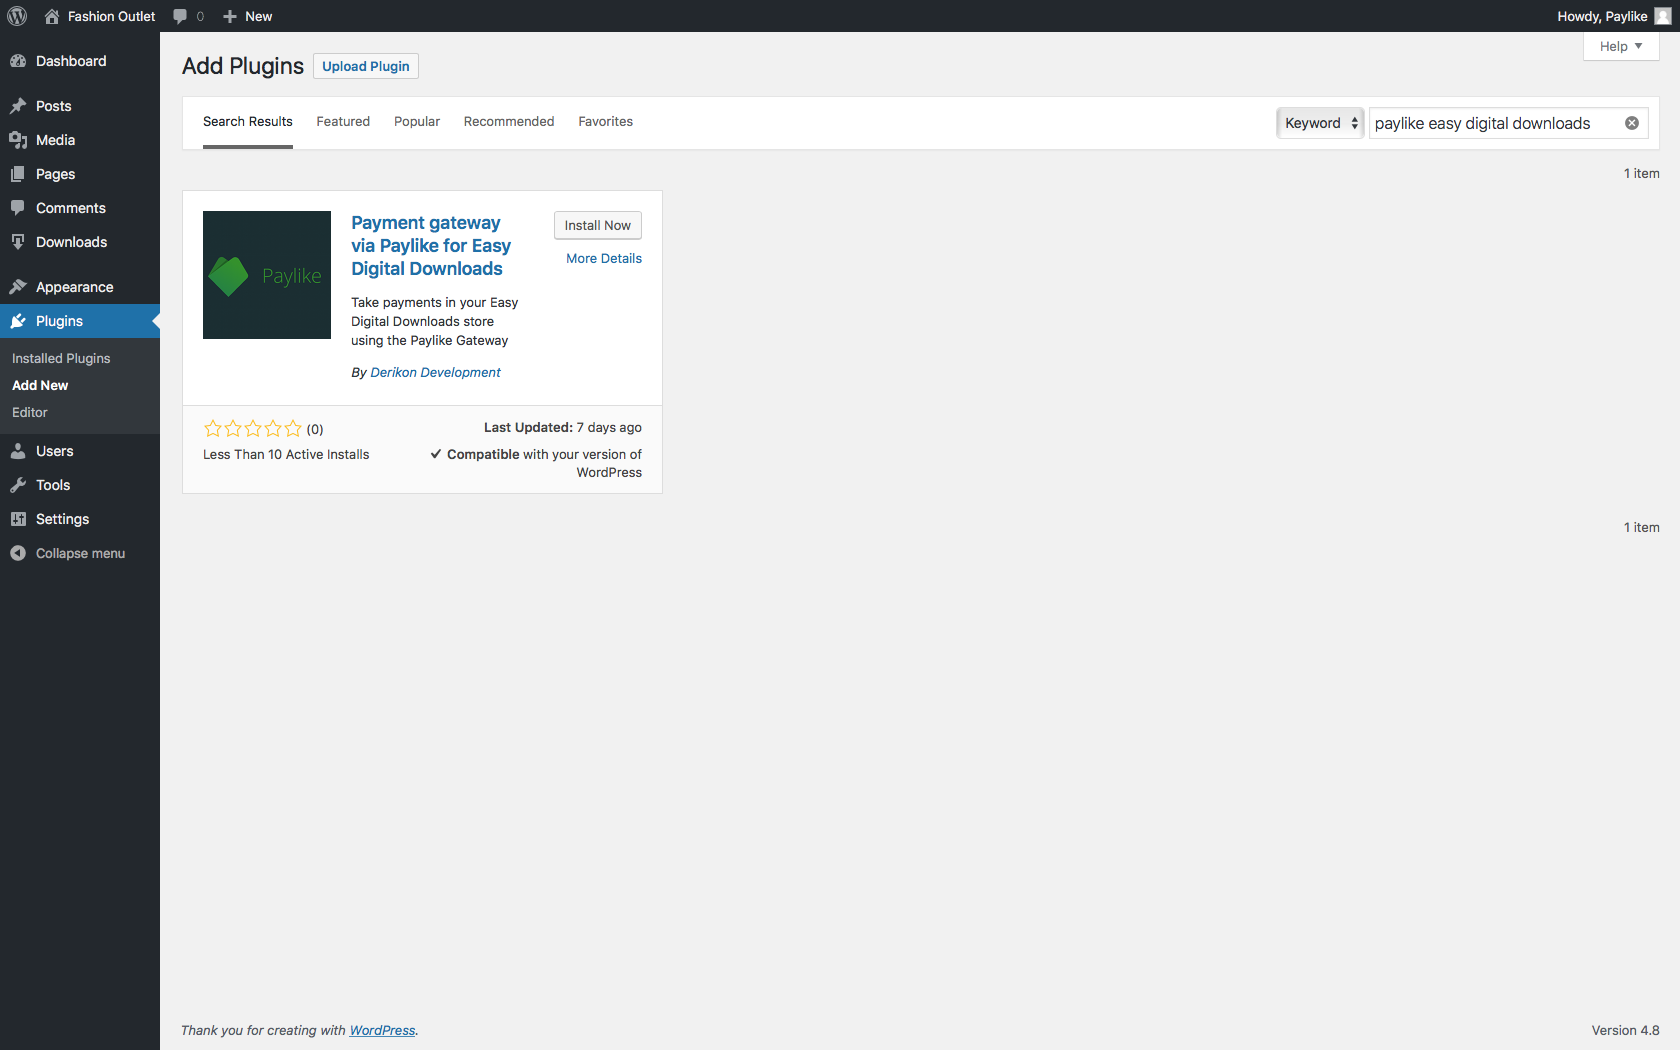
Search for “paylike easy digital downloads” directly in the plugin directory and install the plugin.
wordpress.org/plugins/edd-paylike-payment-gateway/
-
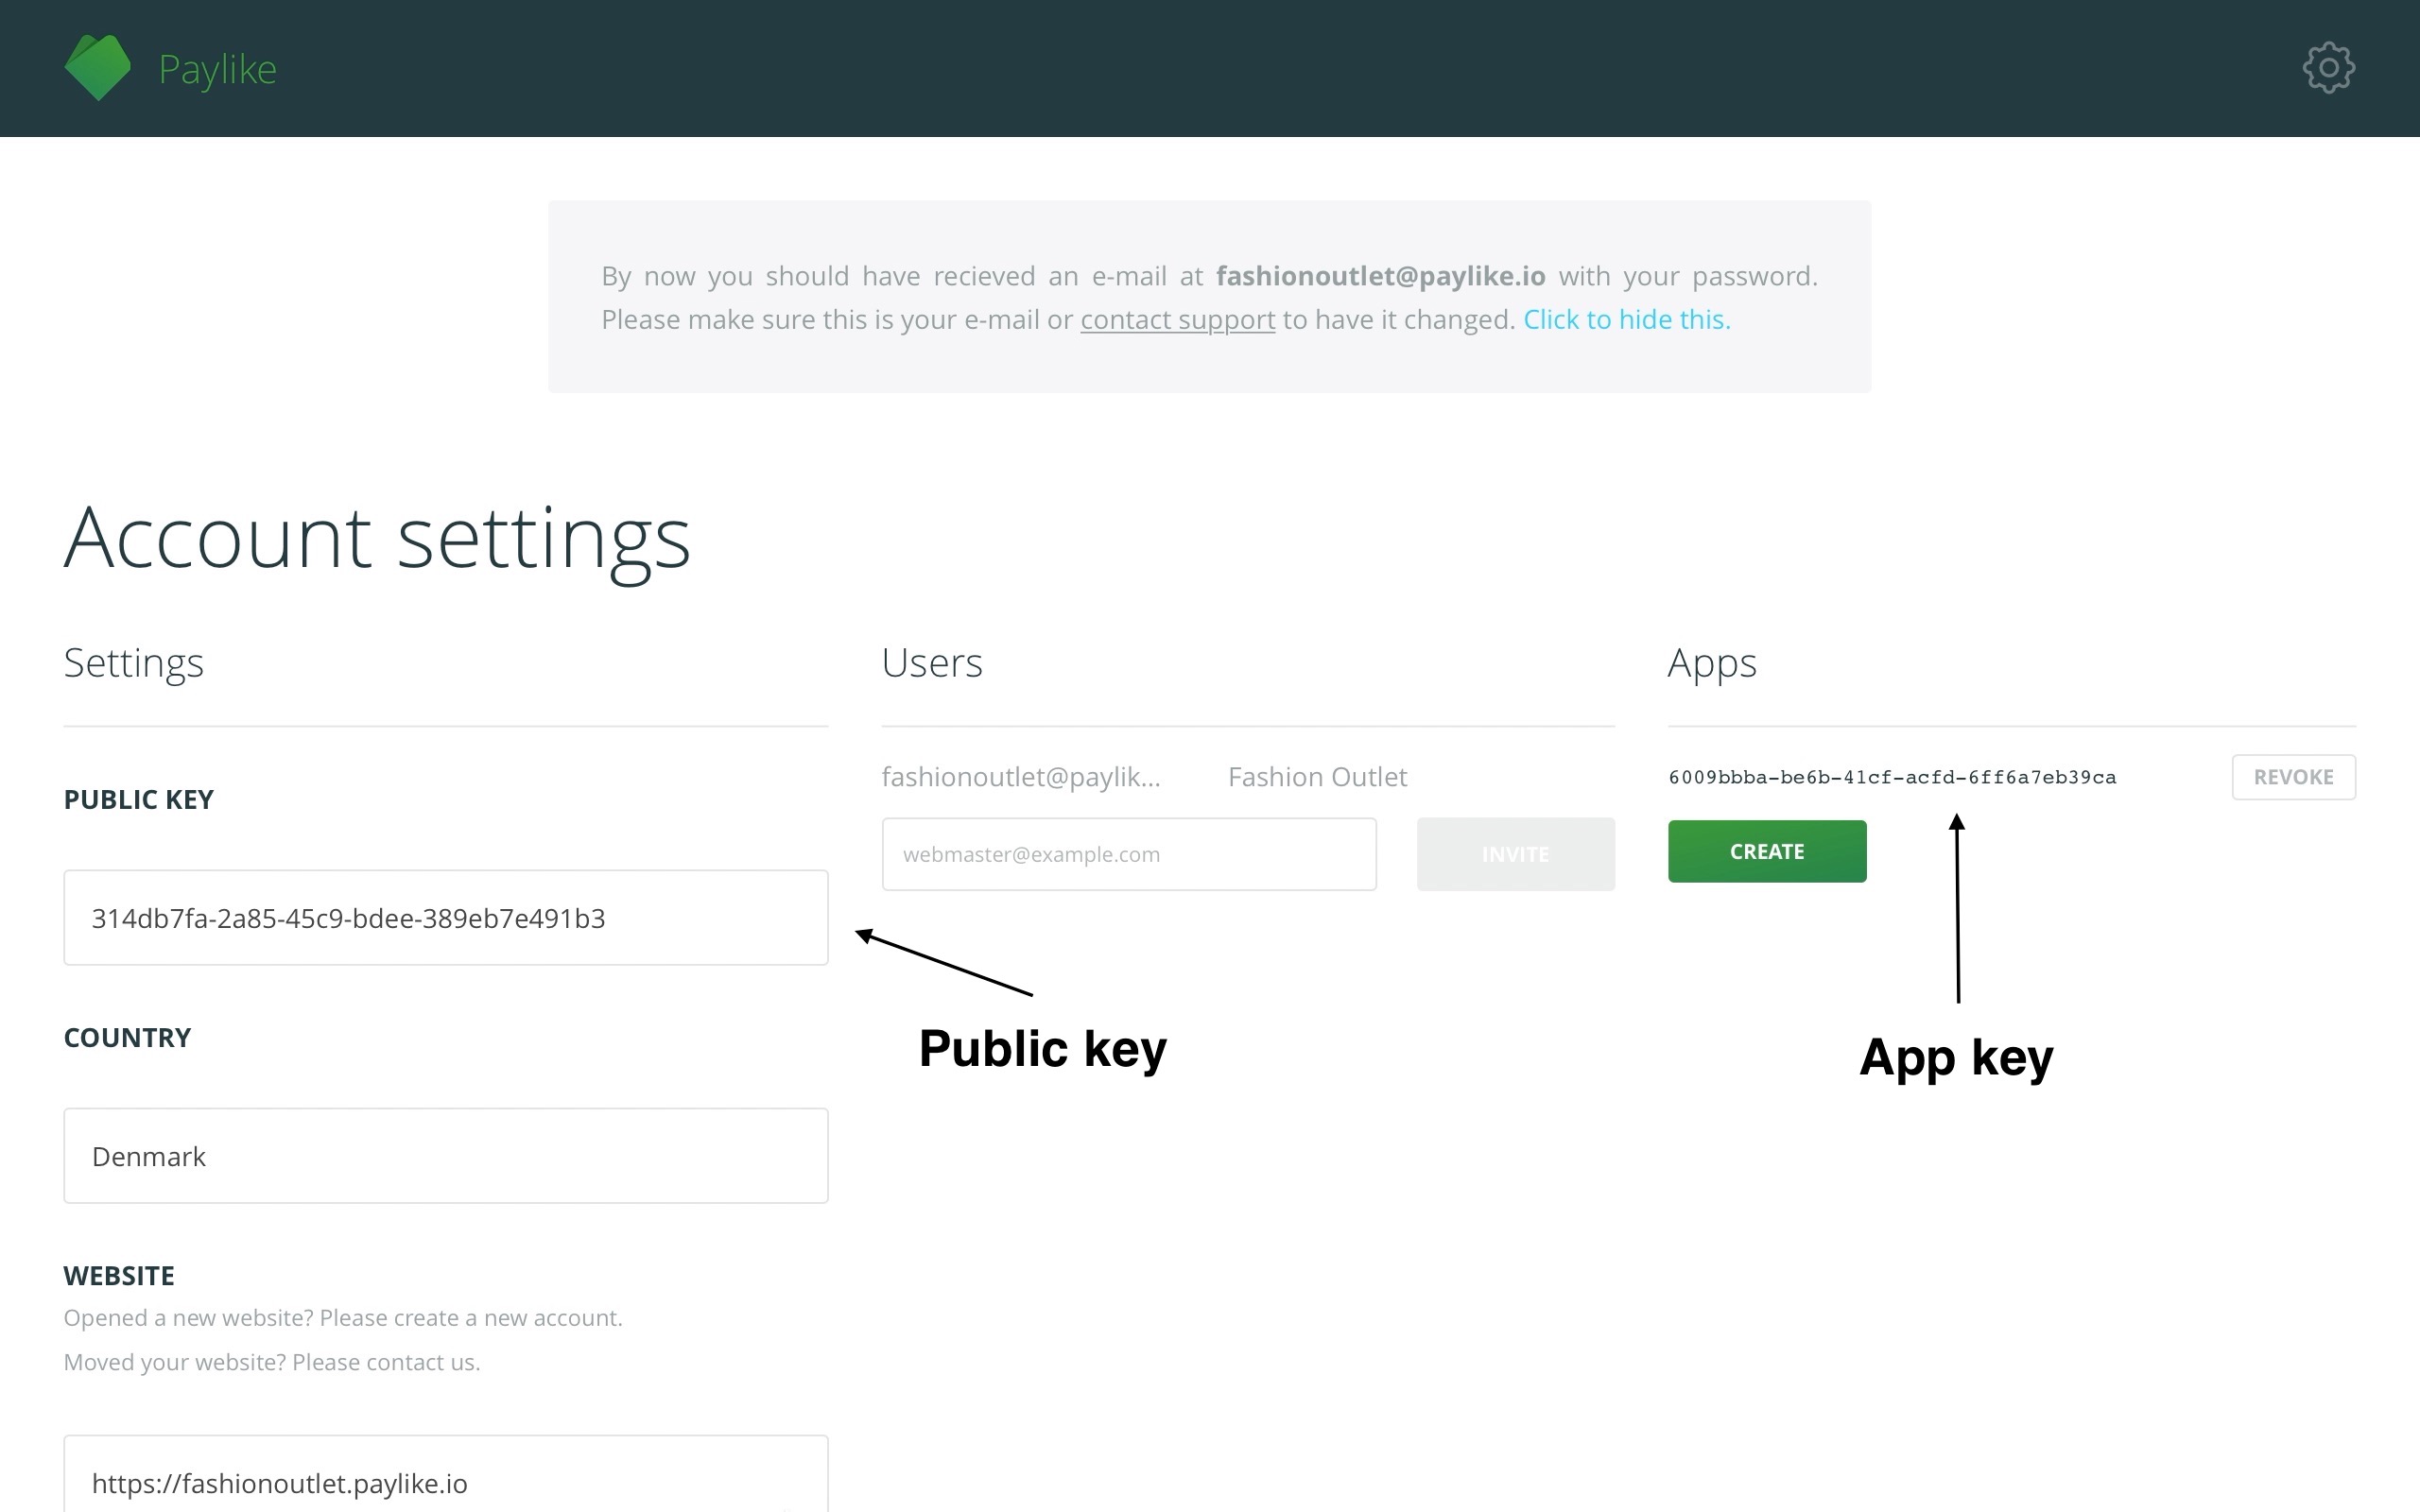
Copy your public key and app key
Copy your public key and app key from the Paylike dashboard.

-
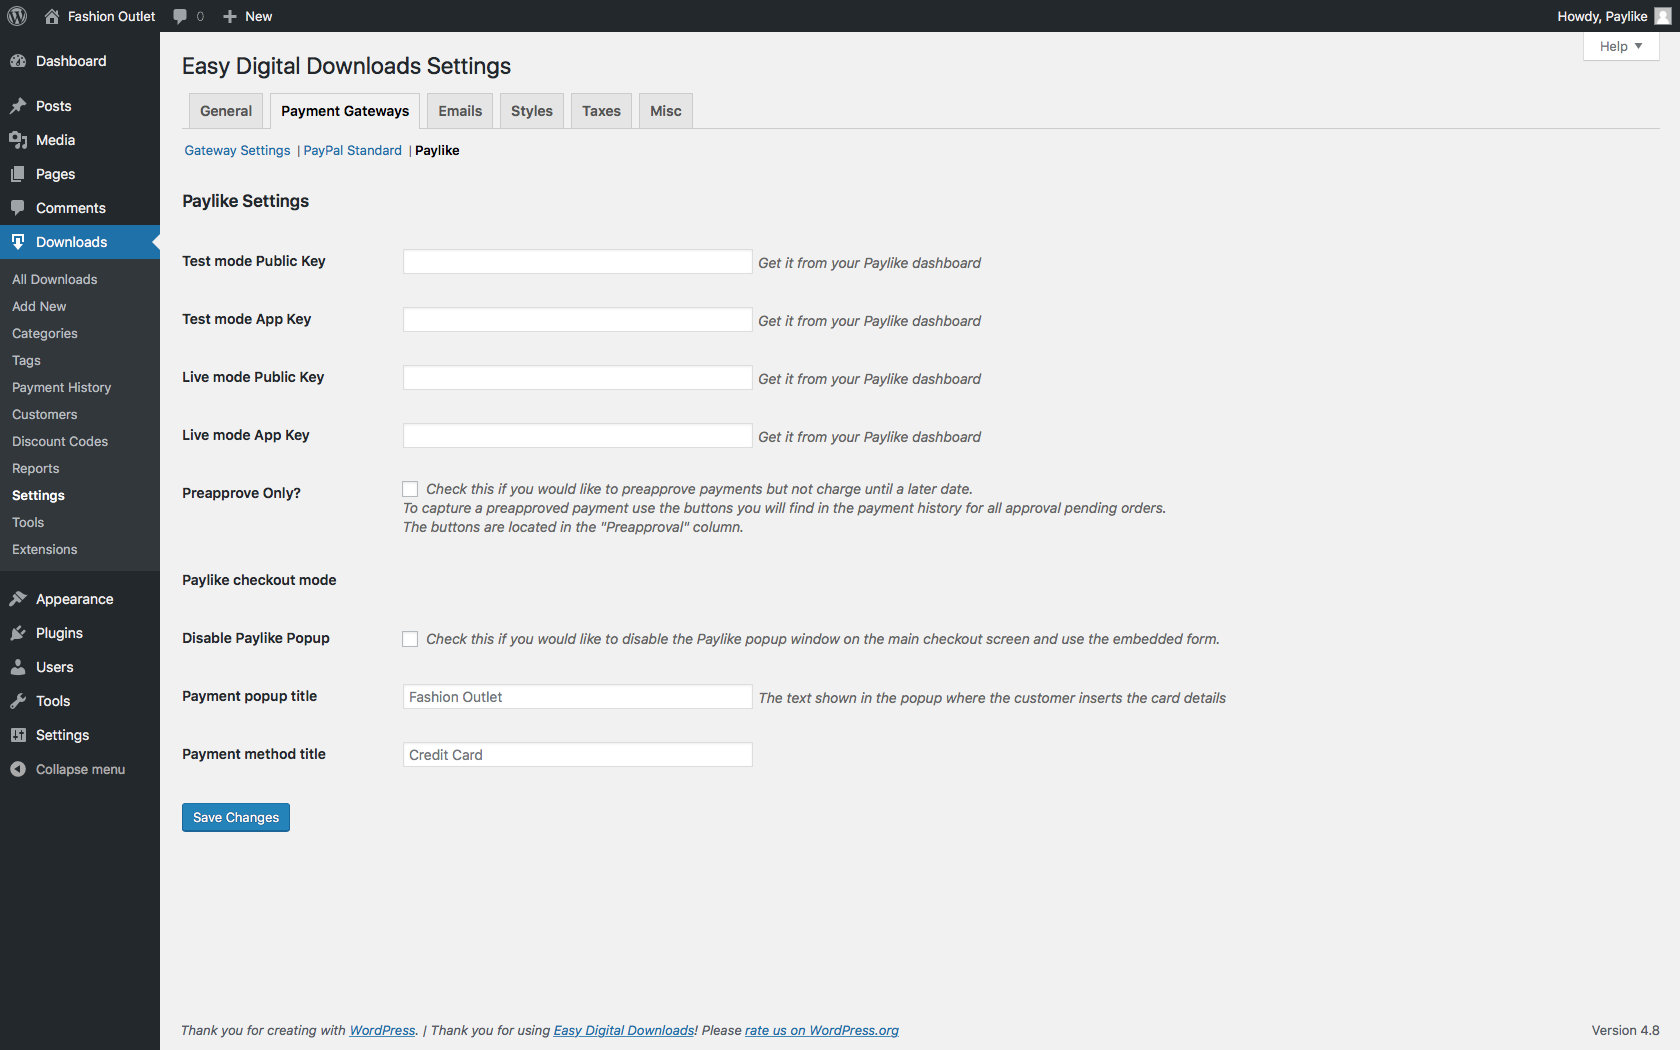
Insert the public key and app key in Easy Digital Downloads
The last step is to insert the public key and app key in the fields “Live Mode Public Key” and “Live Mode App Key” on the settings page of the Plugin (Downloads->Settings->Payment Gateways->Paylike).

-
Paylike has now been integrated with your Wordpress and Easy Digital Downloads store
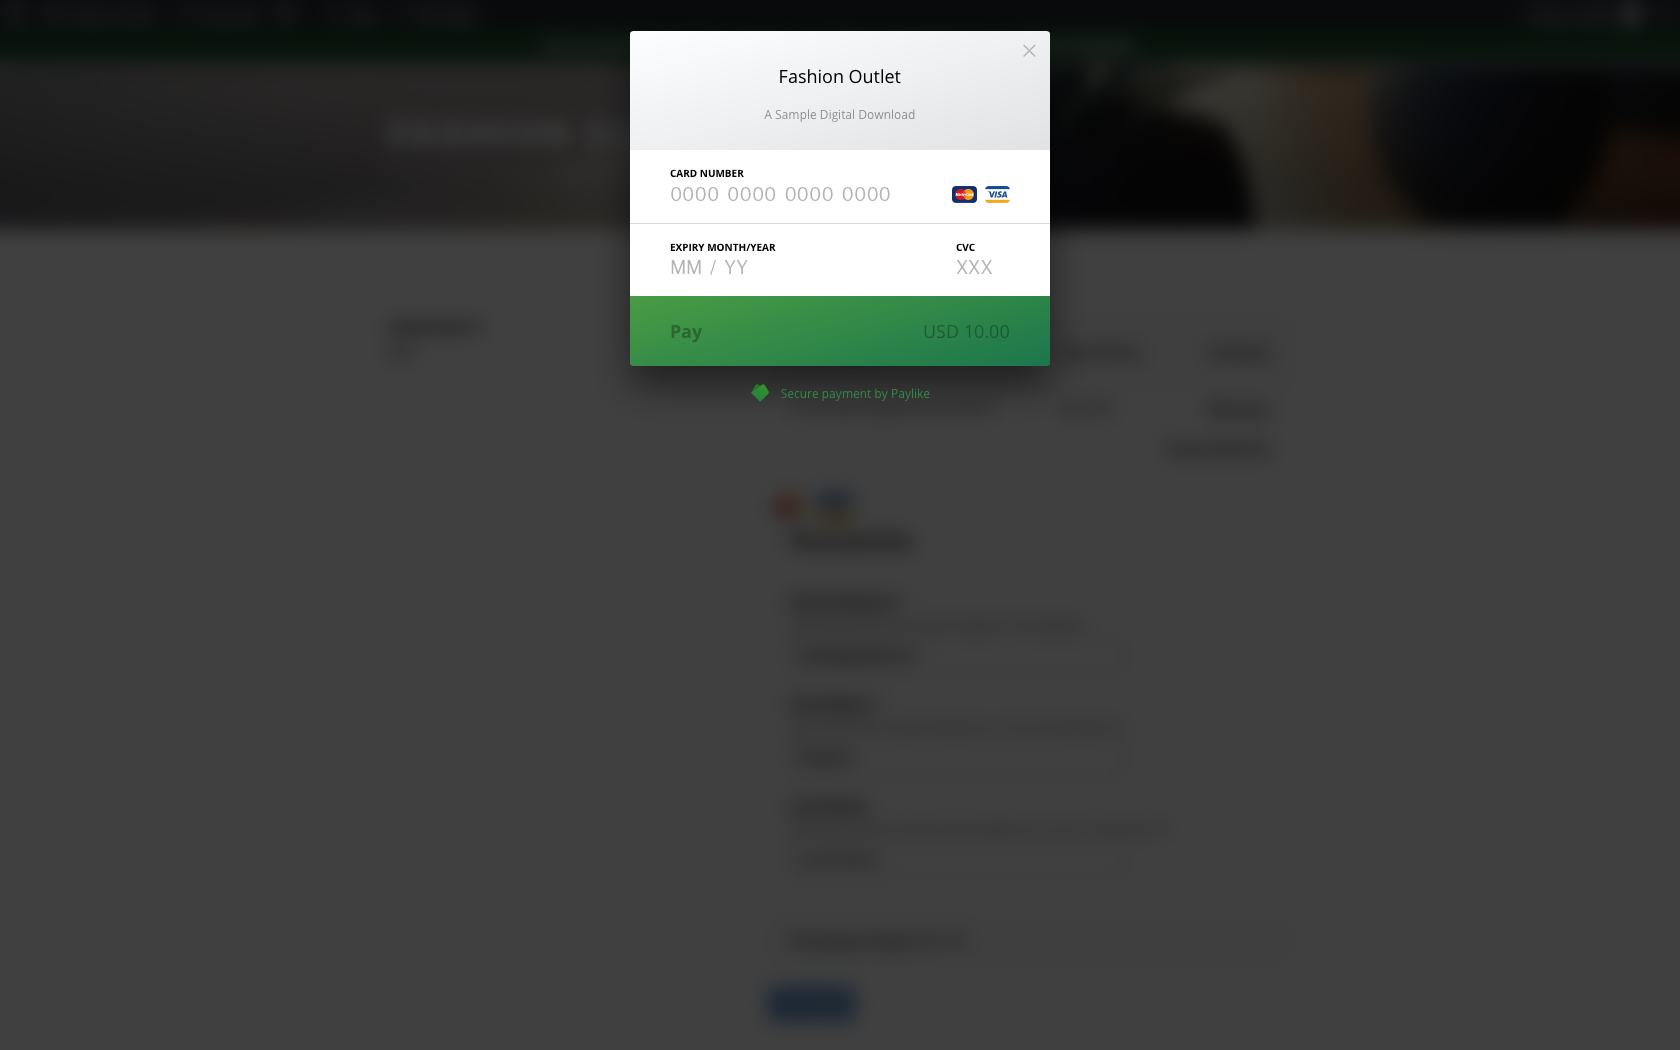
You're all set. Paylike has now been setup successfully on your website and you are ready to accept payments!

How to use the plugin
Capture
Out of the box the plugin captures all payments immediately after it has been authorised.
To activate delayed capture mode, go to the settings page of the plugin (Downloads->Settings->Payment Gateways->Paylike) and tick the “Preapprove Only?” checkbox.
With this setting active, the plugin will not capture the payment before you go to Downloads->Payment History->Preapproval Pending and click “Process payment”.
Use delayed capture mode if you are not delivering the download immediately to the customer.
Refund:
From a specific payment (“order”), in the box on the right “Update payment” change the status to “Refunded” and tick the “Refund transaction in Paylike” checkbox. Choose which amount to refund and click “Save Payment”.
Void:
Only payments that haven't been captured can be voided (only the case if you use the delayed capture mode).
Go to Downloads->Payment History->Preapproval and click “Cancel Preapproval” to void a payment.