VirtueMart plugin

Features
Fully integrated with the VirtueMart backend
Instant and delayed capture
Full and partial refunds
Void transactions
Steps:
-
Sign up with Paylike
If you haven't done so already, head over and sign up with Paylike and create a live account.
-
Download the Paylike payment plugin for VirtueMart
Click on the button below and download the extension as a zip file.
Paylike payment plugin for VirtueMart -
Install the Paylike payment plugin for VirtueMart
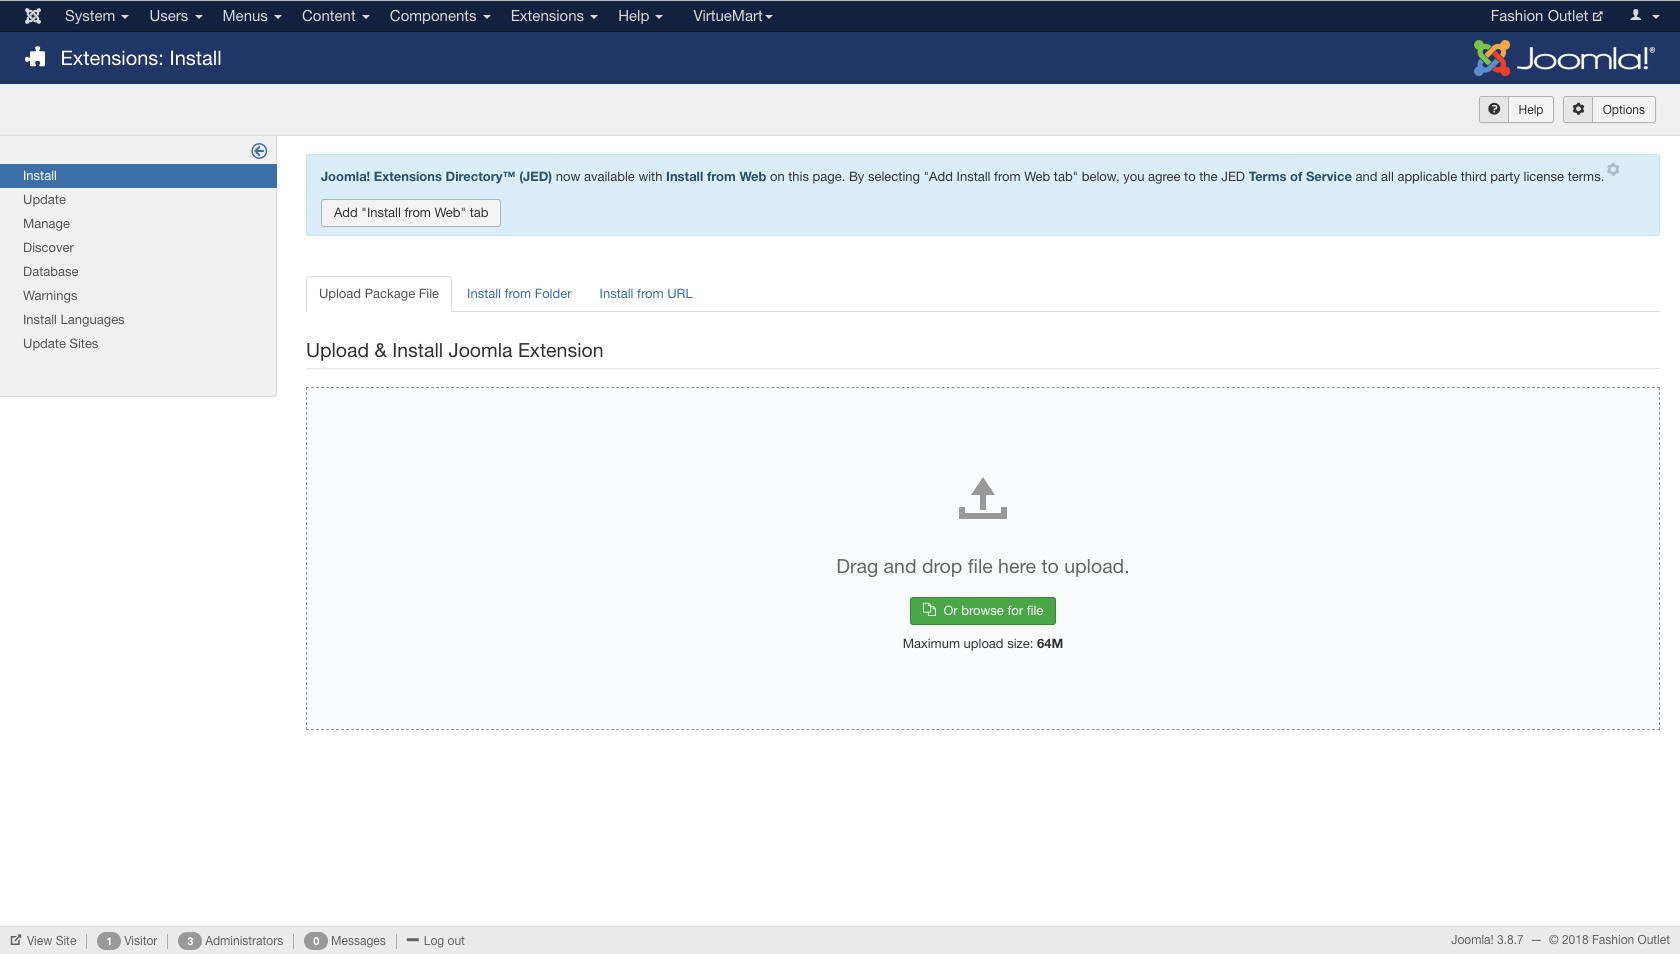
Go to the “Extensions” option on the upper menu of the Joomla control panel, select “Manage” and click on “Install”. Upload and install the zip file you just downloaded in the previous step.
-
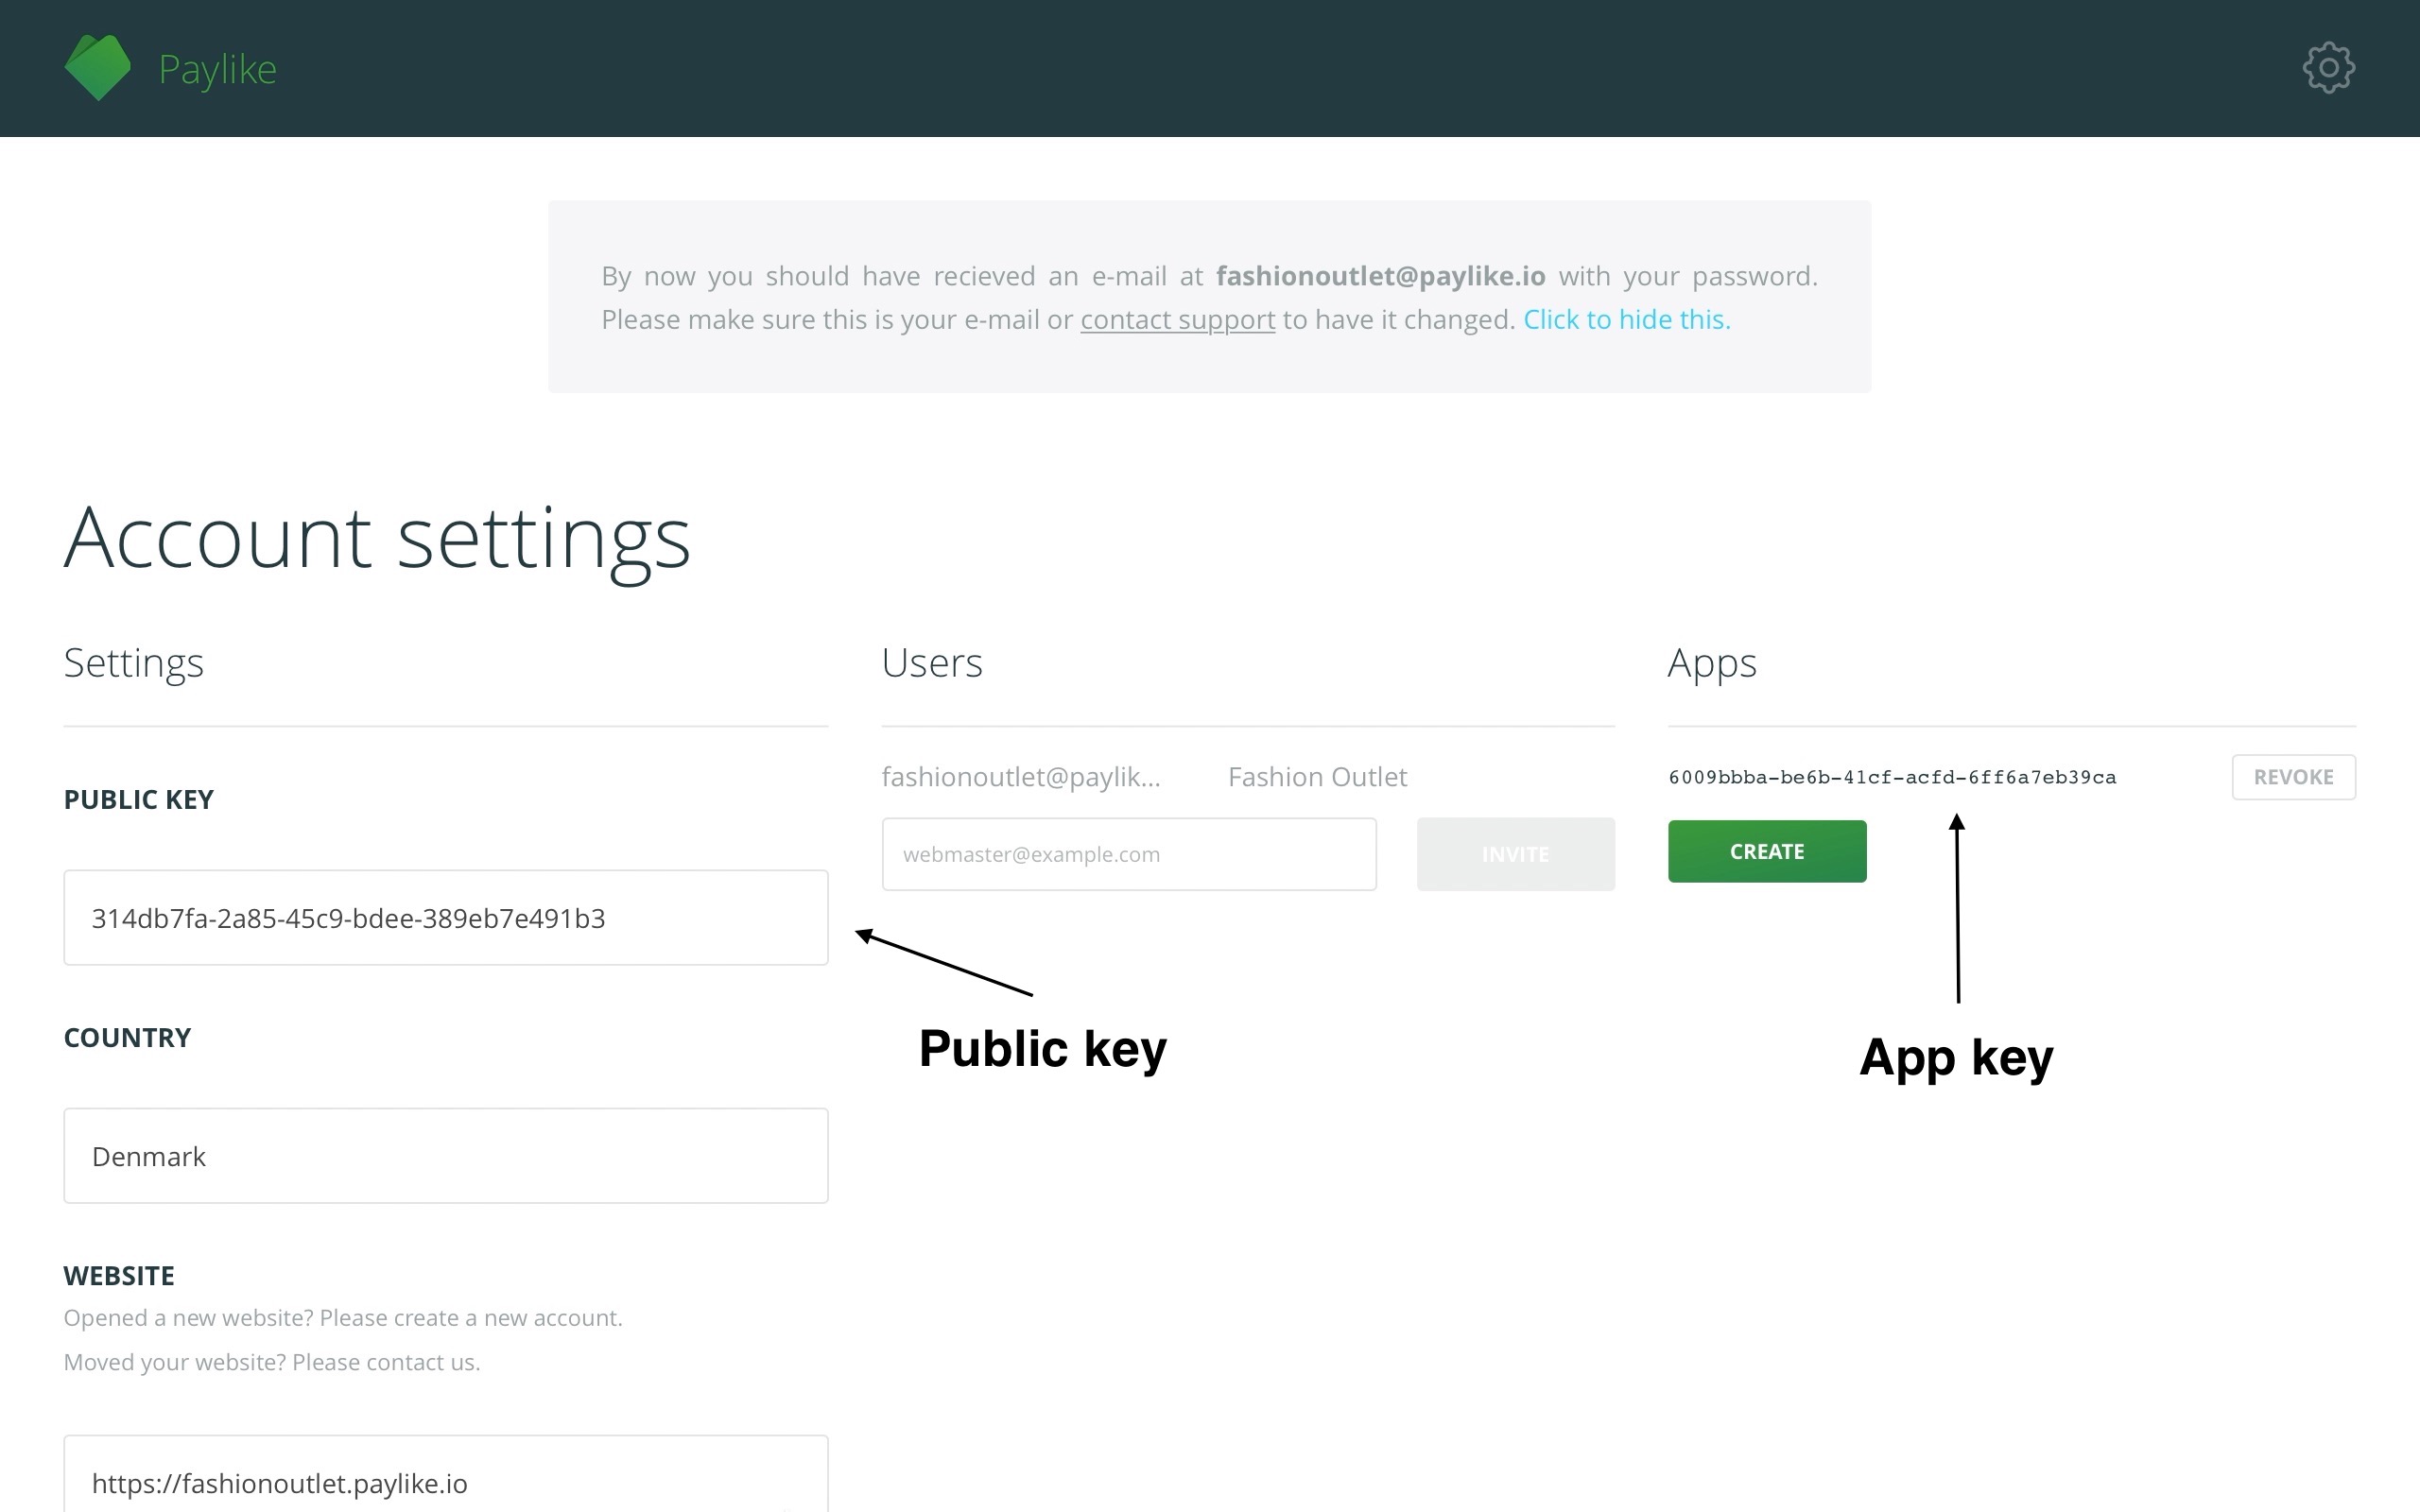
Copy your public key and app key
Copy your public key and app key from the Paylike dashboard.
-
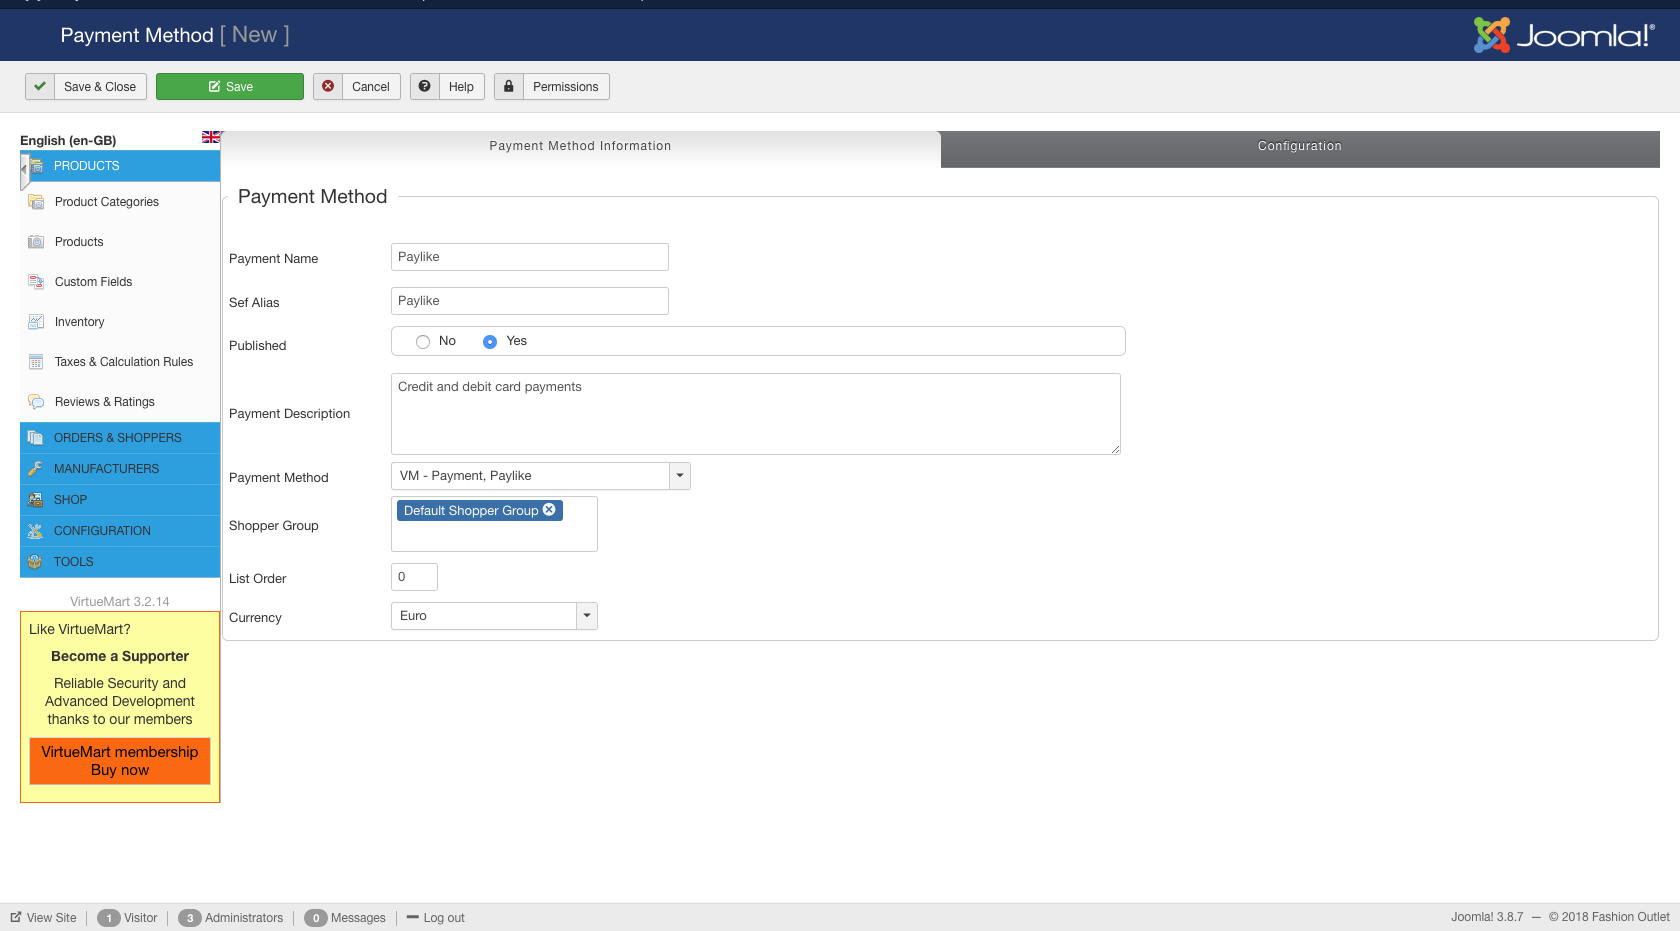
Add Paylike as a new payment method in VirtueMart
Navigate to the “Components” option on the upper menu, select “VirtueMart” and click on “Payment Methods”. Add a new payment method by clicking on the green “New” button and fill out the form. Make sure you have selected Paylike under the “Payment Method” field before saving.
-
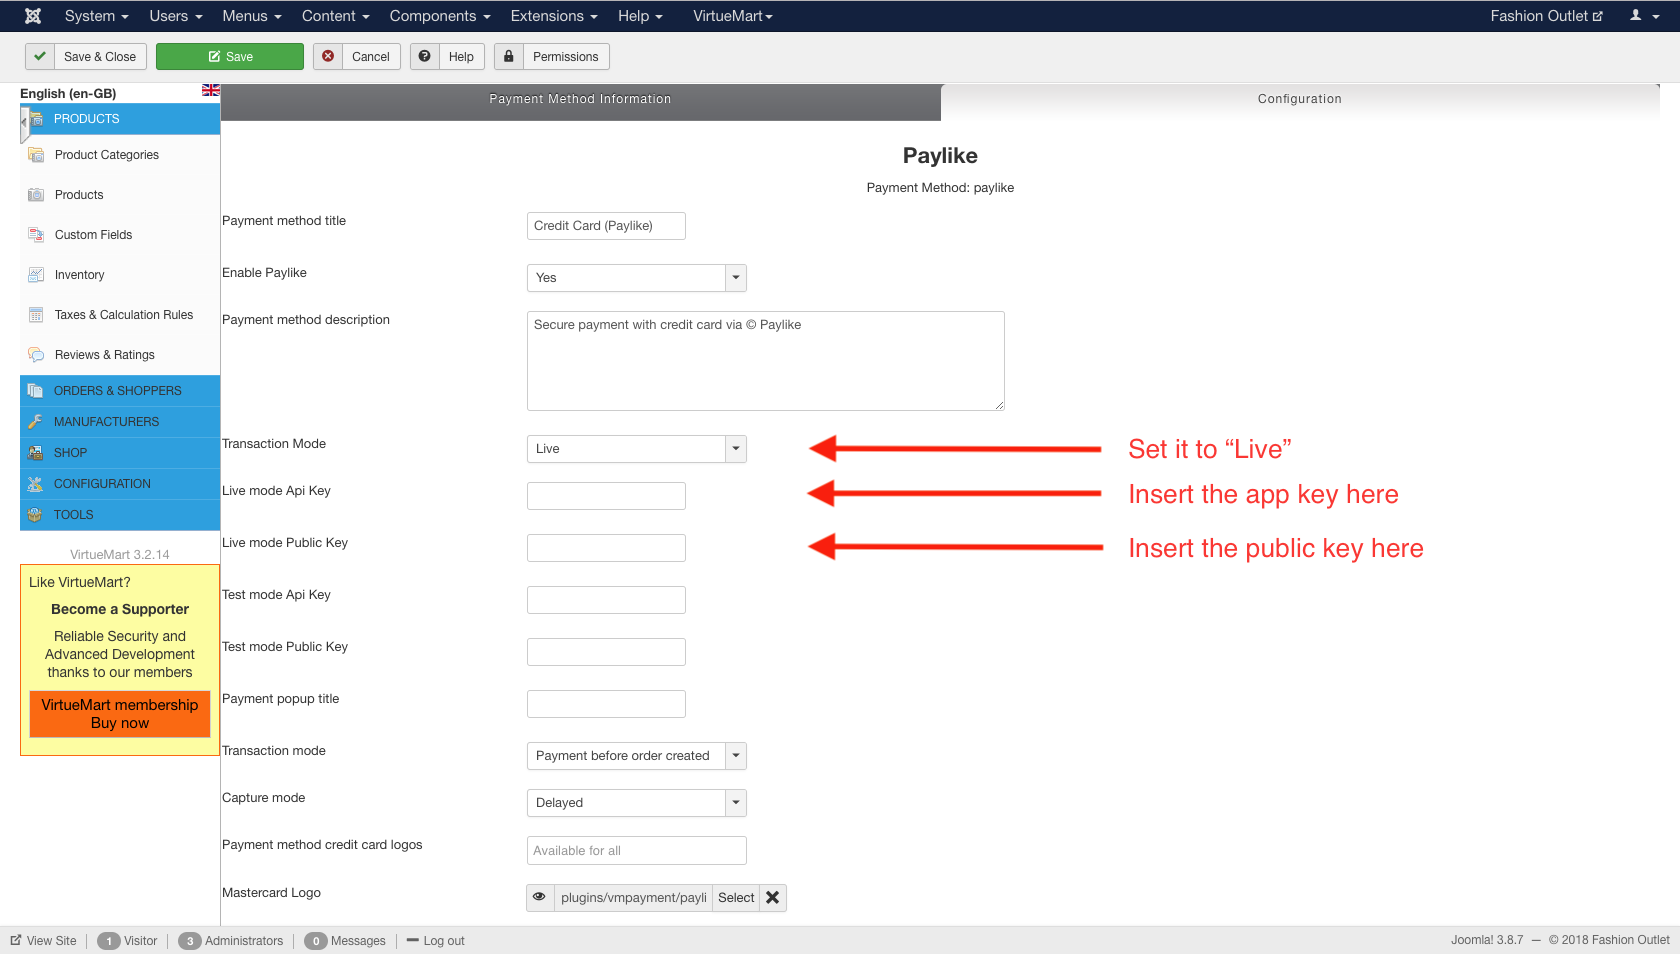
Set the "Transaction mode" to "Live" and insert the public key and app key
Go back to the “Payment Methods” page, select the payment method you just created and click on “Configuration” to access the plugin's settings. Set the “Transaction mode” to “Live” then insert the public key and app key in the fields “Live mode Public Key” and “Live mode Api Key”. Click on “Save” as the last step.”
-
Paylike has now been integrated with your VirtueMart store
You're all set. Paylike has now been setup successfully on your website and you are ready to accept payments!
Supported operations by the VirtueMart payment plugin
Capture
Payments can be captured in two different modes. In “Delayed” mode, payments are only captured when the order status is changed to “Shipped” in VirtueMart. When the “Instant” mode is selected, the transactions are captured right away when the customer makes the payment.
Void
A transaction will be voided automatically if the order status in VirtueMart is changed to either “Cancelled”, “Refunded” or “Refund Half”.
Refund
A captured transaction can be refunded completely by setting the order status to “Refunded”. For issuing a partial refund, you can transfer back half of the funds to your customer's card by setting the order status to “Refund Half”. If you wish to refund a different amount, you can do that manually through the Paylike dashboard.