
WooCommerce payment plugin


Features
 Fully integrated with the WooCommerce backend
- Fully integrated with WooCommerce Subscriptions
- Instant and delayed capture
- Full and partial refunds
- Void transactions
Steps:
-
Sign up with Paylike
If you haven't done so already, head over and sign up with Paylike and create a live account.
-
Install the Paylike payment plugin
Search for “paylike” directly in the plugin directory and install the plugin.
da.wordpress.org/plugins/payment-gateway-via-paylike-for-woocommerce/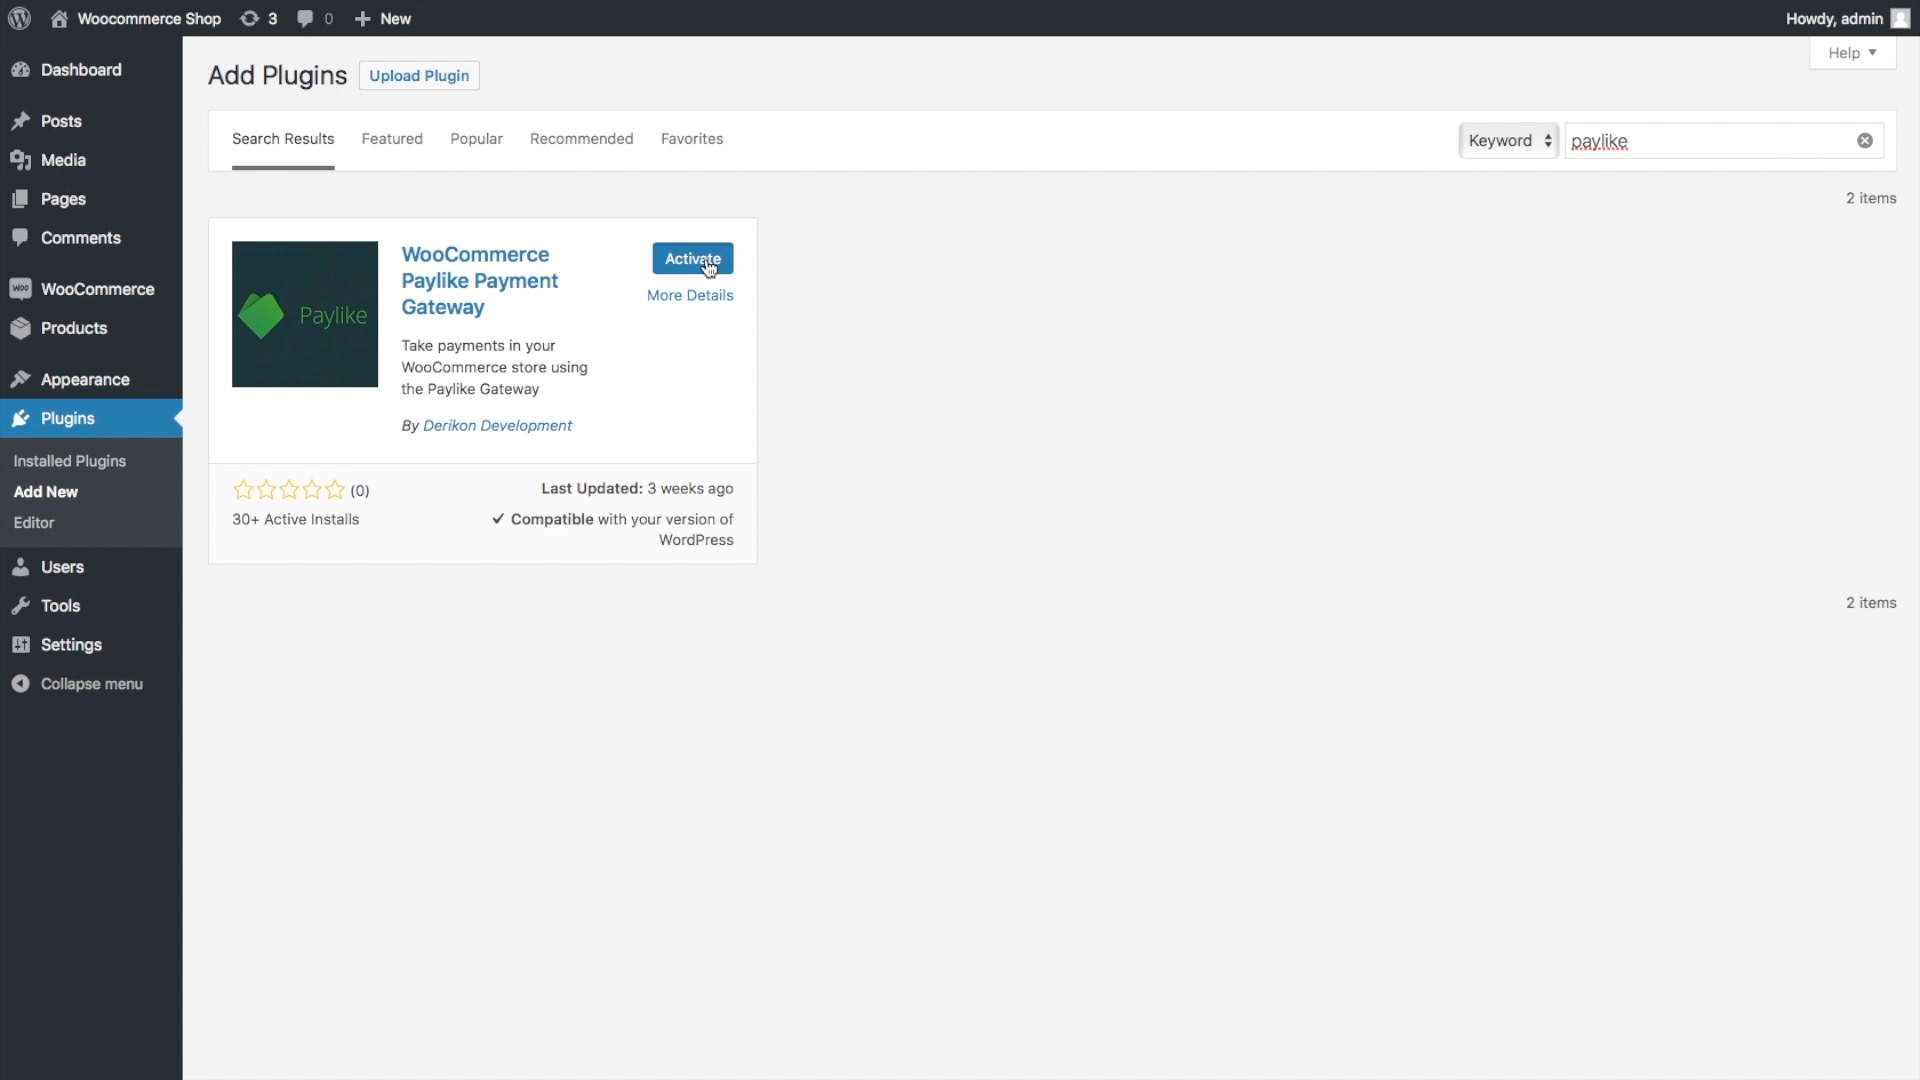
-
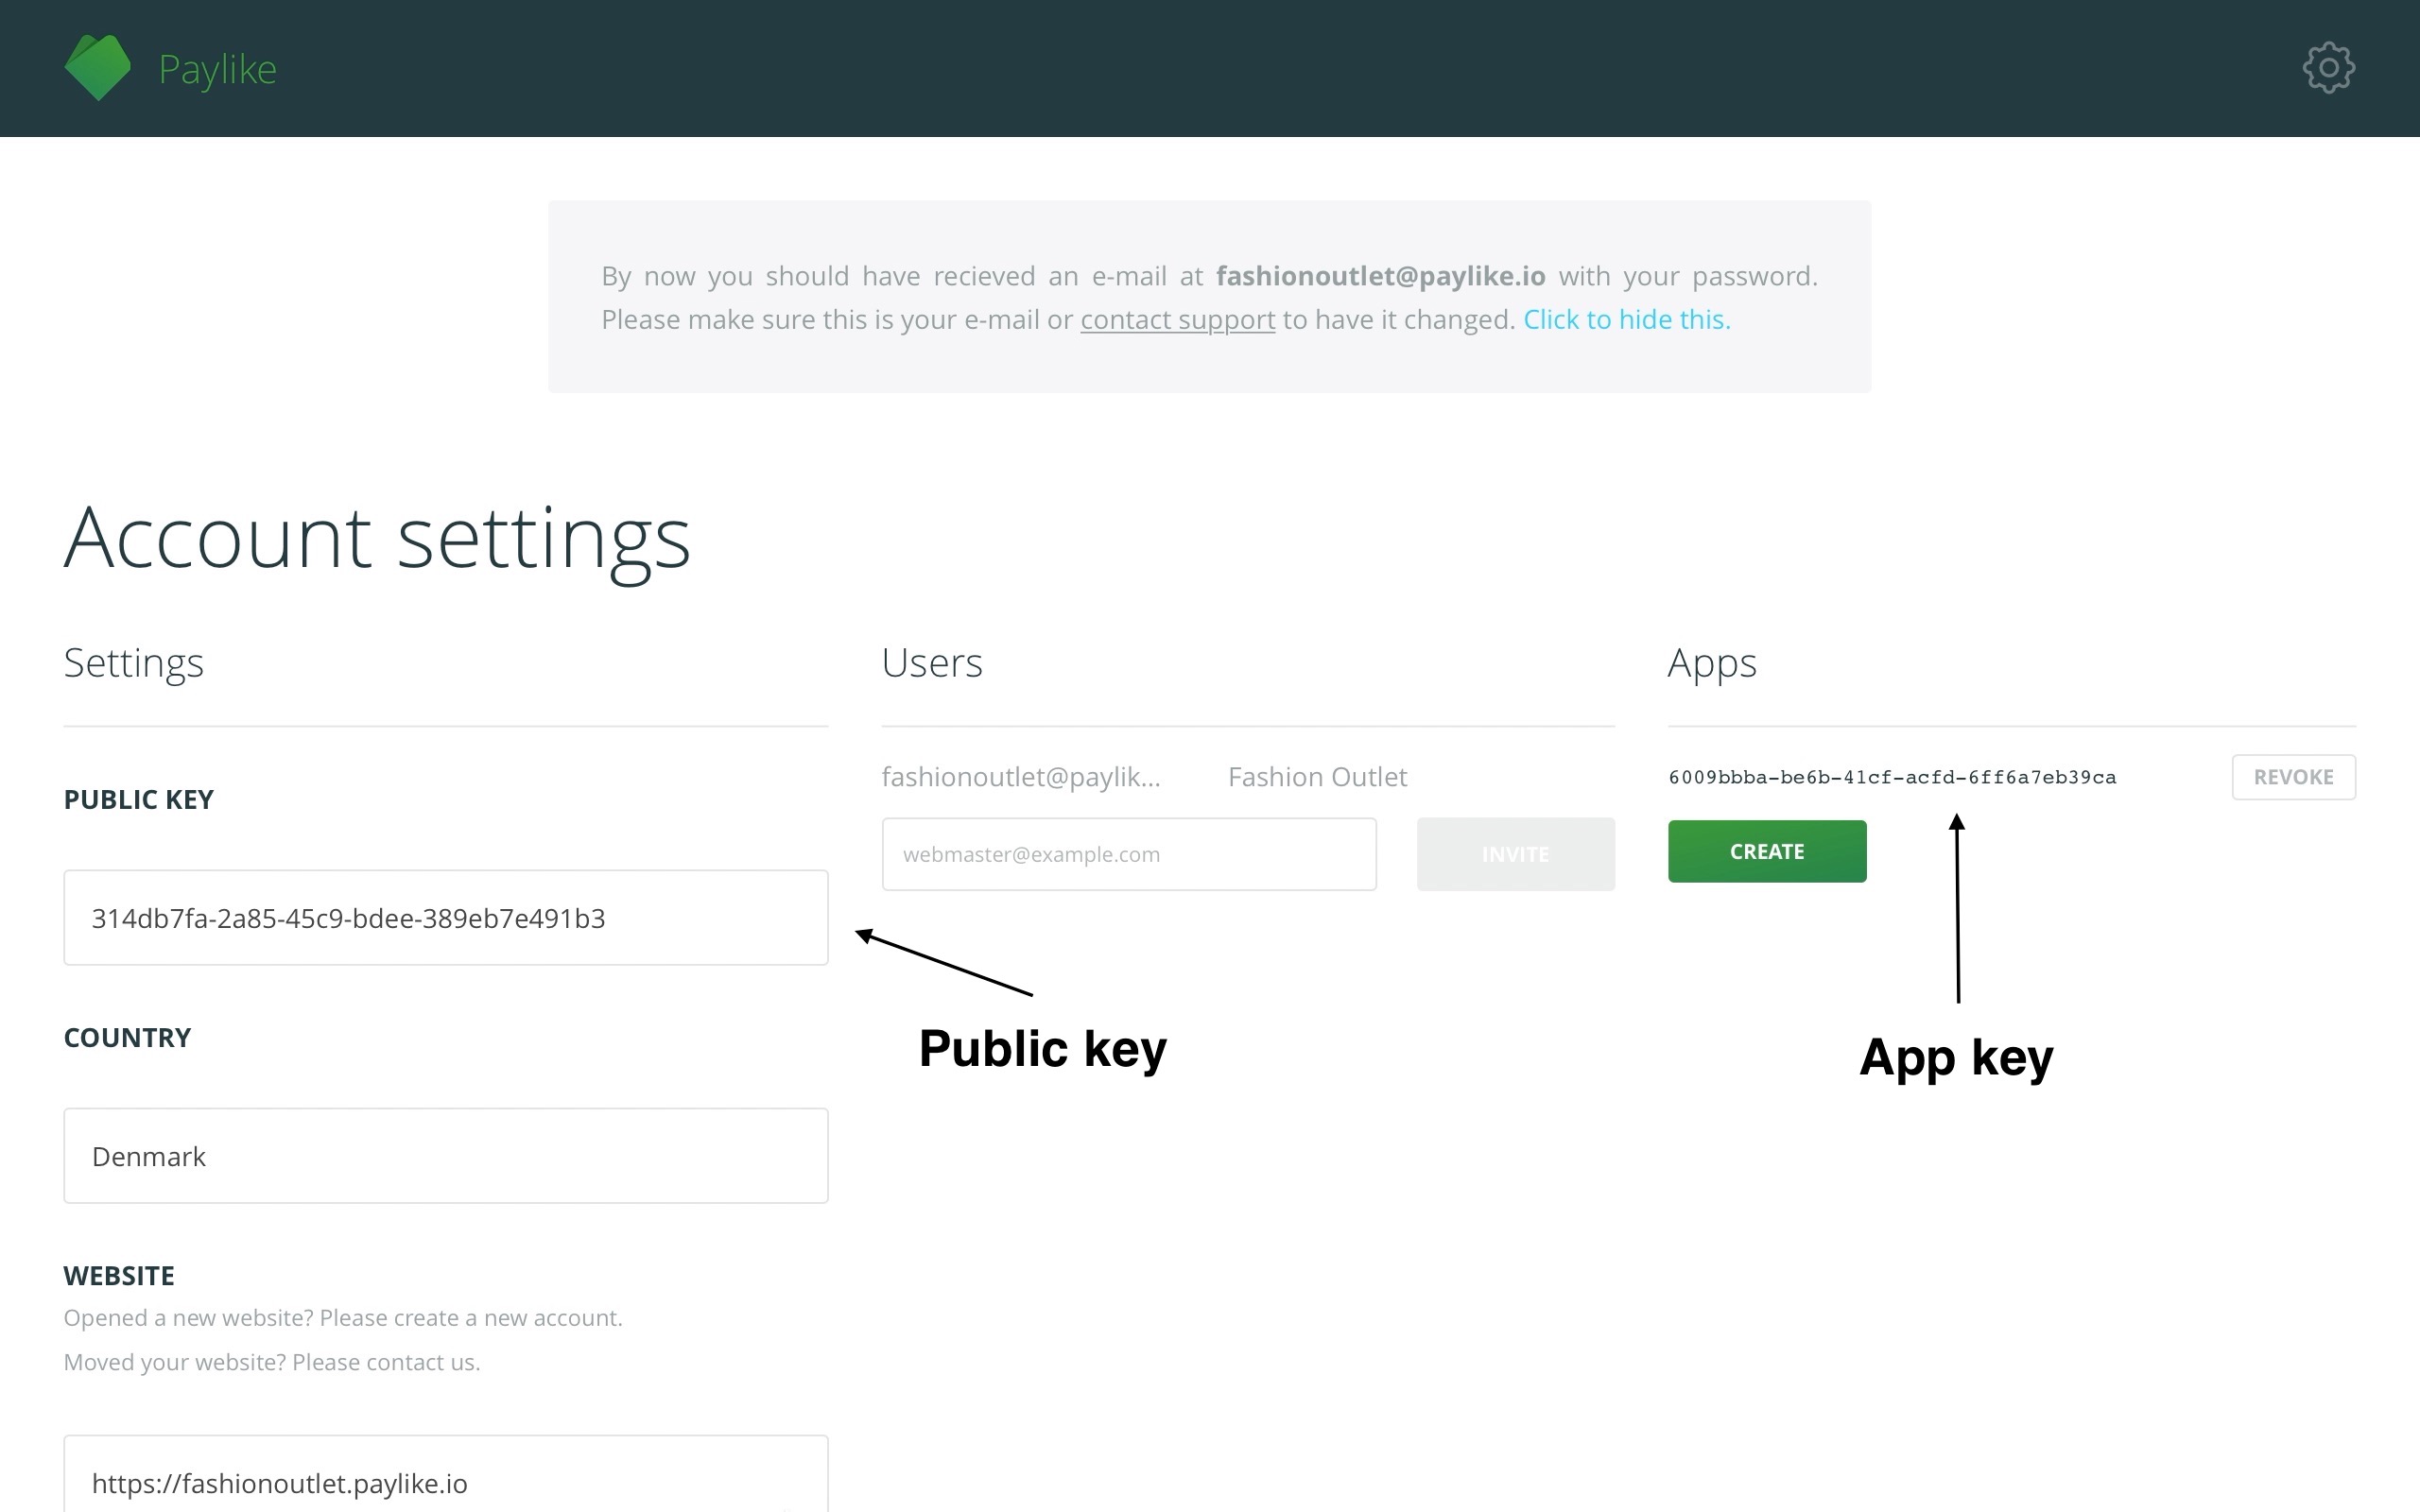
Copy your public key and app key
Copy your public key and app key from the Paylike dashboard.
-
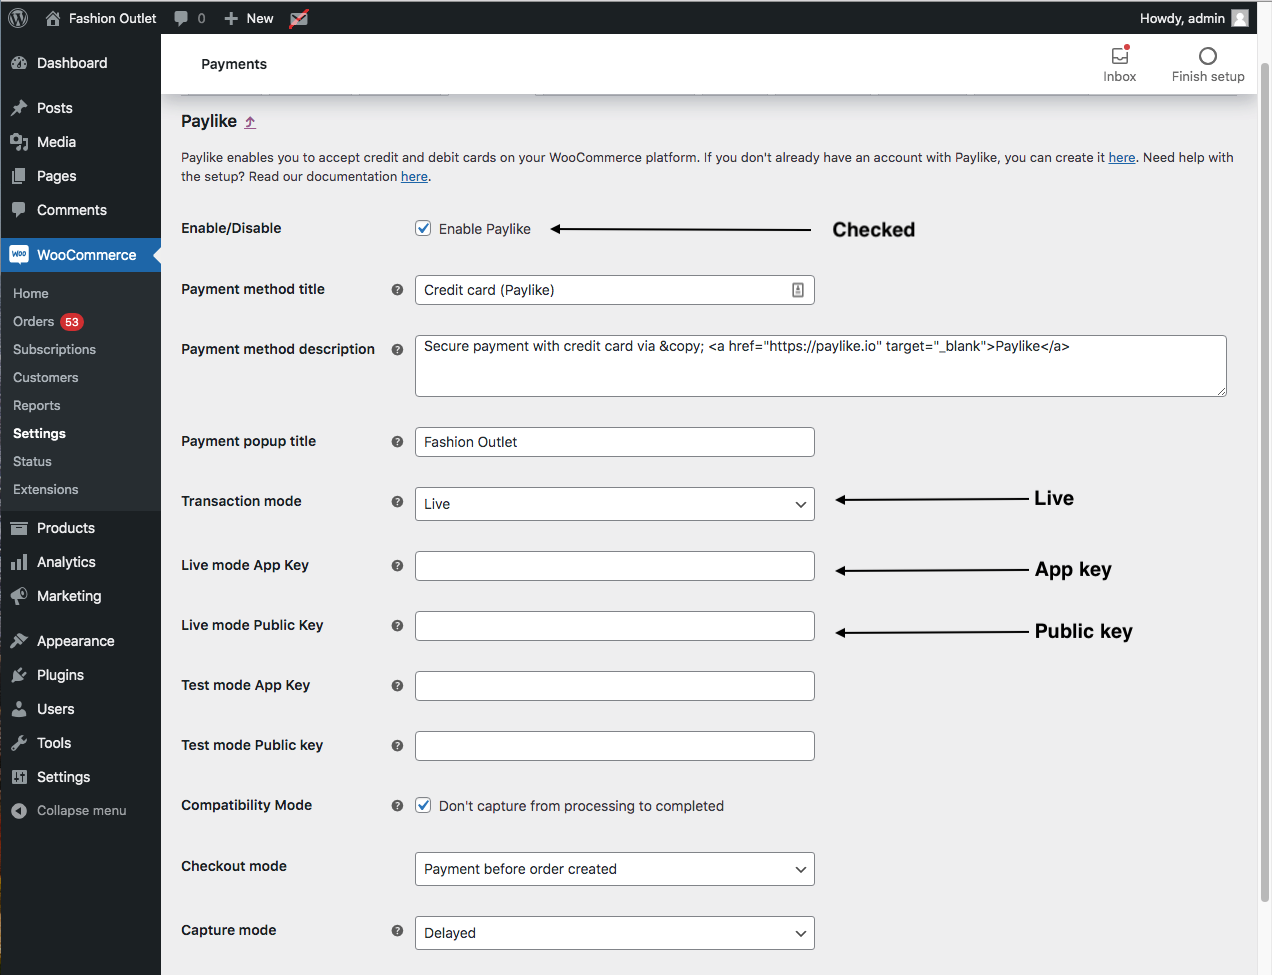
Insert the public key and app key in WooCommerce
The last step is to insert the public key and app key in the fields “Live Public Key” and “Live App Key” on the settings page of the Plugin (WooCommerce->Settings->Checkout->Paylike). Before saving, make sure “Enable Paylike” is checked and the “Test mode” is unchecked.
-
Paylike has now been integrated with your WooCommerce store
You're all set. Paylike has now been setup successfully on your website and you are ready to accept payments!
How to handle WooCommerce orders with Paylike
When you have set up the Paylike plugin for WooCommerce the plugin automatically handles the transactions in Paylike and you should therefore avoid using the Paylike dashboard to manually capture, refund or void payments.
Instead use the WooCommerce order system as it has been designed. If you are new to WooCommerce, see their documentation on Managing Orders.
The Paylike plugin for WooCommerce fully integrates and follows WooCommerce’ default settings.
If you want to understand exactly how transactions are handled in Paylike or wish to customize your settings, then read further below.
If you are new to payment card transactions, read about transactions first.
Captures
A transaction is captured either immediately if the Capture mode is set to “Instant” or once the order status is set to “Completed” if the “Capture mode” is set to “Delayed”. Learn when to use “Instant” and when to use “Delayed” mode here.
Refunds
To refund an order, use the build in refund functionality in WooCommerce and make sure not to choose “Manual”.
See “Automatic refunds” in the WooCommerce documentation.
Voids
To void a transaction, follow the steps outlined above in the “Refunds” section. Please note that in case the transaction has already been captured, this will create a refund.
“Pending payment” and “Failed” order status
If you configure the Checkout mode to “Redirect to payment page after order created” the order is first created and then the payment is made. In case your customer fails to pay for any reason, the order status will be set to “Failed”.
WooCommerce’ default time to keep an order in the “Pending payment” status is 60 minutes, but you can change or entirely remove this time limit by going to WooCommerce->Settings->Products->Inventory and update the field “Hold stock (minutes)” (see the WooCommerce documentation for more details).
Additional plugin settings
We do not recommend changing the defaults unless you are an advanced user.
Payment method title
This is the text shown in the checkout where the customer selects their payment method.
Note: Your theme may overwrite this text.
Payment method description
The payment method description is shown below the “Payment method title”.
Note: Your theme may overwrite this text or simply not show it.
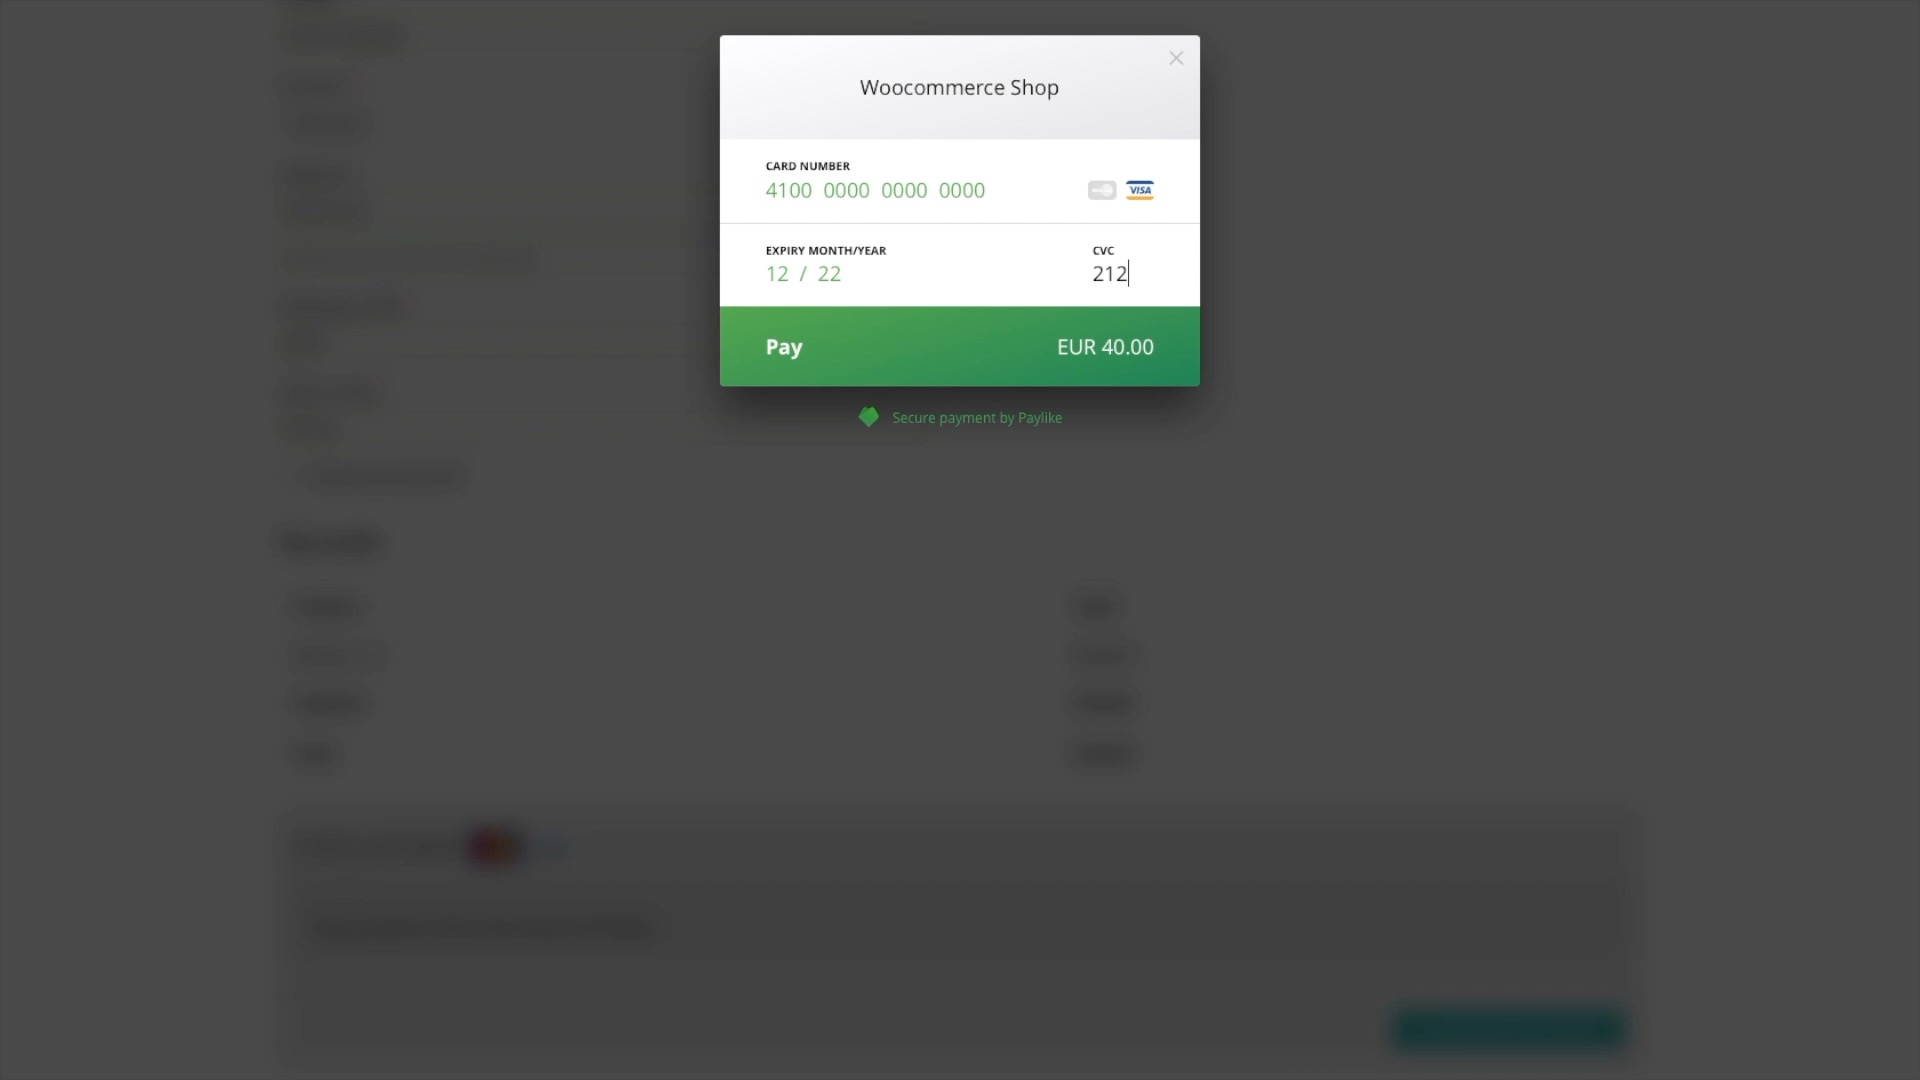
Payment popup title
This is the title shown at the top of the payment popup (example here showing “Fashion outlet”).
Transaction mode
The transaction mode is used to select between your live and test account credentials. Make sure to use “Live” when you publish your shop as transactions made on a test account are not processed.
Compatibility mode
The compatibility mode has been introduced to allow users to avoid having the plugin capture transactions when changing the order status from “Processing” to “Completed”.
When compatibility mode is enabled, you must transition the order to “On hold” and then to either “Processing” or “Completed” to capture the transaction.
Unless you have a specific workflow that requires your orders to first go to “On hold”, we do not recommend to enable compatibility mode.
Checkout mode
The checkout mode defines when the payment takes place. The default mode is “Payment before order completed” and opens the payment popup directly in the checkout prior to creating the order.
If you choose to use the “Payment before order completed” checkout mode, please be aware that the payment (transaction) is made before the order is created. Meaning, you can have situations where the customer makes a payment, but fails to complete the order.
To avoid this issue, please select the checkout mode “Redirect to payment page after order created” as the order is then first created and the payment is made afterwards.
If a transaction is created, but no order is created you should either create a new order or void the payment and ask the customer to try again.
Capture mode
The capture mode setting defines when the transaction is captured. You must not capture transactions prior to delivering (or shipping for physical goods) the order to the customer.
If you are not delivering the order immediately, set the “Capture mode” to “Delayed”.
If you are delivering the order immediately, e.g. if you sell a digital product that is delivered immediately after the payment, set the “Capture mode” to “Instant”.
In “Delayed” mode the transaction is captured when the order status is set to “Completed” (unless compatibility mode is enabled).
In “Instant” mode the transaction is captured immediately after the order is created.
Store Payment Method
If you enable “Store Payment Method” the customer can choose to tick a box during the checkout to save their card for later use.
The plugin does not store the card details, but simply a tokenized version of the card according to the WooCommerce specification. Read more here and here.
Note: Your Paylike account must be approved to charge your customers cards without them being present, reach out to hello@paylike.io if your account is not already approved for it.
Accepted Cards
Choose which card network logos are shown in the checkout next to the payment method.
Supported extensions
With the Paylike plugin for WooCommerce the following extensions are supported:
WooCommerce Subscriptions - Fully integrated with WooCommerce automatic recurring payments